
The monkeys kept moving while I adjusted my shutter speed, and the sun kept moving too.
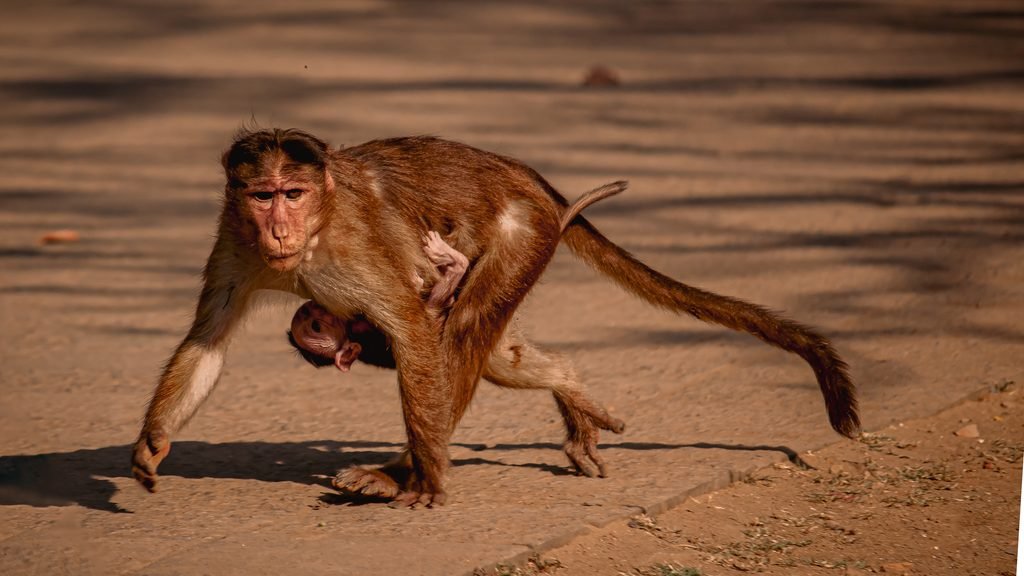
A mother monkey stepped out of the bushes and crossed the stone path, holding her baby close to her belly. Two seconds went by. That was all I had. There was no time to change settings or check the corners of the frame, so I pressed the shutter and hoped for the best. The alternative was leaving empty-handed.
Moments like that taught me more than any book did. The best landscape photography tips don’t involve buying a four-thousand-dollar camera or memorising exposure charts. They come down to noticing what others miss and knowing when to take the shot.
Over the years, three things have helped me most: looking at a spot before I pick up the camera, managing light, and avoiding the silly mistakes I used to make. I’ll walk you through each one below.
Starting Out on a Beat-Up Nokia Phone
The nature photographer began this journey back in school. The mother had a Nokia XpressMusic phone. The camera had a megapixel count. The nature photographer used it to capture everything: puddles in the driveway cracked plaster walls stray dogs resting on the porch and the study table. The nature photographer did not understand range. The nature photographer just loved capturing moments and looking at them later.
Everything changed when the nature photographer started college to study Digital Film Production.
Learning cinematography changed the nature photographer’s vision. The nature photographer began to notice details: how afternoon sun slices razor‑wedge across an alley how cool blue shadows highlight dirt tones. How lowering the chin by six inches changes the entire mood of a scene.
Places the nature photographer had lived in for a decade suddenly looked new.
That change is still at the heart of the nature photographer’s approach. Taking nature photography is not about collecting postcards of landmarks to prove a trip. It is about capturing the details that make the nature photographer stop walking.
Keep the Camera in Your Bag for the First Ten Minutes
When arriving at a trailhead or riverbank the nature photographer’s hands reach for the camera instinctively. The nature photographer must pause. The camera should stay in the bag.
Just walk around. Breathe slowly. Where do shadows fall? Does the sunlight light up the grass? Does it skim across the dirt showing texture? Is there a shaped rock or a piece of driftwood near the bank that could fill half the frame?
Nine times out of ten the nature photographer’s first idea is lazy. If the nature photographer walks twenty paces down the bank ducking under a branch or waits five minutes for a cloud to drift over the sun the scene becomes much better.
Give the scene a second. The hills do not go away.
Stop Fighting the Light You Have
Light changes the feeling of a nature photography shot. A rocky hillside seems peaceful and gentle at 6:30 AM blistering and empty at 1:00 PM and grim under a grey sky.
Hard direct sun: shadows, bright highlights and a lot of contrast.
Overcast rainy skies: no glare, rich green colors and wet rock textures.
The nature photographer often talks about the hour—a time around dawn and dusk. The amber light is nice. The nature photographer should not pack up just because the sky turns grey and flat. Overcast days act like a softbox reducing reflections and making forest scenes or waterfalls look rich and smooth. Even strong midday sun can look striking if the nature photographer looks for shadows or switches to black and white.
Work with the light that nature provides that day than being upset about a sun that is not there.
My 5-Step Process: Landscape Photography Tips You Can Use Todayld
I do not follow a list. Nature is untidy. The nature photographer must go with what’s happening in front of the nature photographer. Generally this is how the nature photographer’s mind works through a scene:
1. Look without looking through the lens. Walk while keeping your eyes on the scene not the lens. Notice how your eyes move.
2. Find the subject. Every good photo has one thing. A third? Wait…??
We want :
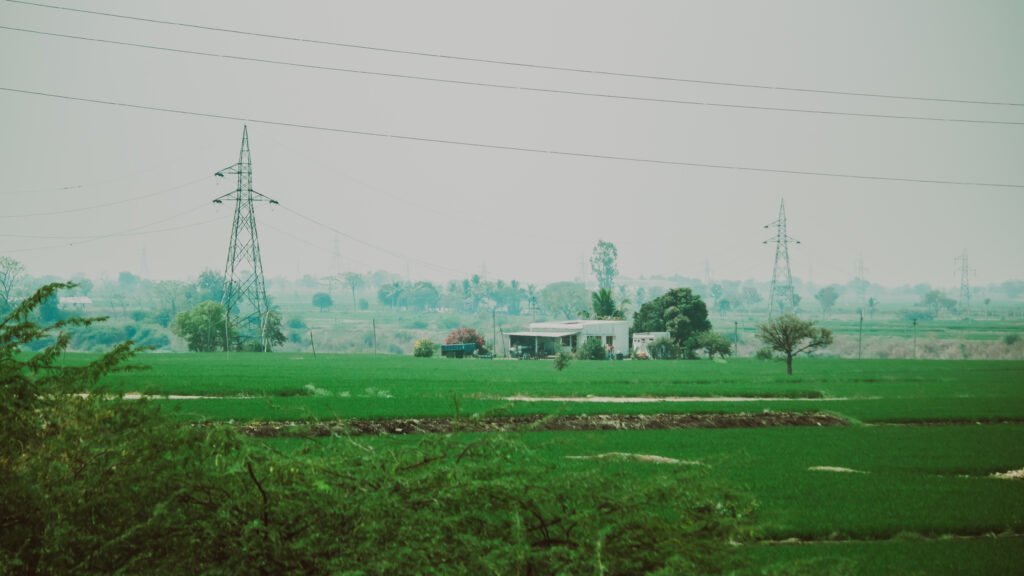
4. Clean up the edges. Observe the corners carefully. Are tree branches intruding into the frame like spider legs? Is there trash on the trail? Move forward. Adjust the framing to eliminate the clutter.
These landscape photography tips work because they slow you down before you shoot.
5. Take one test shot then check and change your angle.
Take a test photo. Look at the histogram to make sure the white areas in the photo are not too bright. Then crouch down move to the left try an angle and take another photo.
After the photo is set modify the settings. Keep the ISO low, like 100 or 200 to keep noise low. Stop the lens to f/8 so that the boots and the horizon stay sharp. Then set the shutter speed depending on whether you hold the photo or put it on a rock.
Composition: Stop Trying to Fit the Whole World in the Lens
Many photographers pull out a lens and try to fit the whole mountain range into one photo. That is a mistake.
That never works. The photo looks dull because everything looks tiny and flat.
Good composition is about removing parts of the photo of adding more.
Choose one thing. If the mountain peak is the subject do not let a parking lot or gravel strip take up half of the photo. Remove that part.
Get low. Eye‑level photos look like vacation pictures because that is how most people see the world. Crouch among the leaves. Climb onto a boulder. Raise the lens an inches above the ground.
Add layers. A photo looks like a picture on a screen. To give depth add layers. Put a mossy rock in front of the feet let the lake sit in the middle and put the ridge line at the back.
Do not follow the Rule of Thirds. Moving the off‑center is a trick that can make a photo feel awkward. It is not a rule. If the photo has a glassy lake reflecting a mountain put the horizon in the middle. Claim it.
Common Mistakes to Avoid|
Here is the converted and properly formatted table based on your notes:
| The Bad Habit | Why It Ruins the Frame | How to Fix It |
| Taking the shot right when you arrive | You end up with a shot that everyone else has. | Wait five minutes; scout. |
| Giving up when it rains | Sunny blue skies are actually quite dull on camera. | Wet rock, fog, and rain‑soaked bark create photos. |
| The “kitchen sink” frame | Trying to fit every tree and hill makes the photo feel empty. | Choose one subject. Zoom in. Take ten steps forward. |
| Sloppy frame edges | Stray twigs, power lines, and trash distract the eye. | Check all four edges before pressing the shutter. |
| Blaming your equipment | Assuming you are bad because your camera did not cost $3,000. | Work on light and framing; gear will not fix taste. |
The Monkey Incident: Why Patience Is Better Than Everything
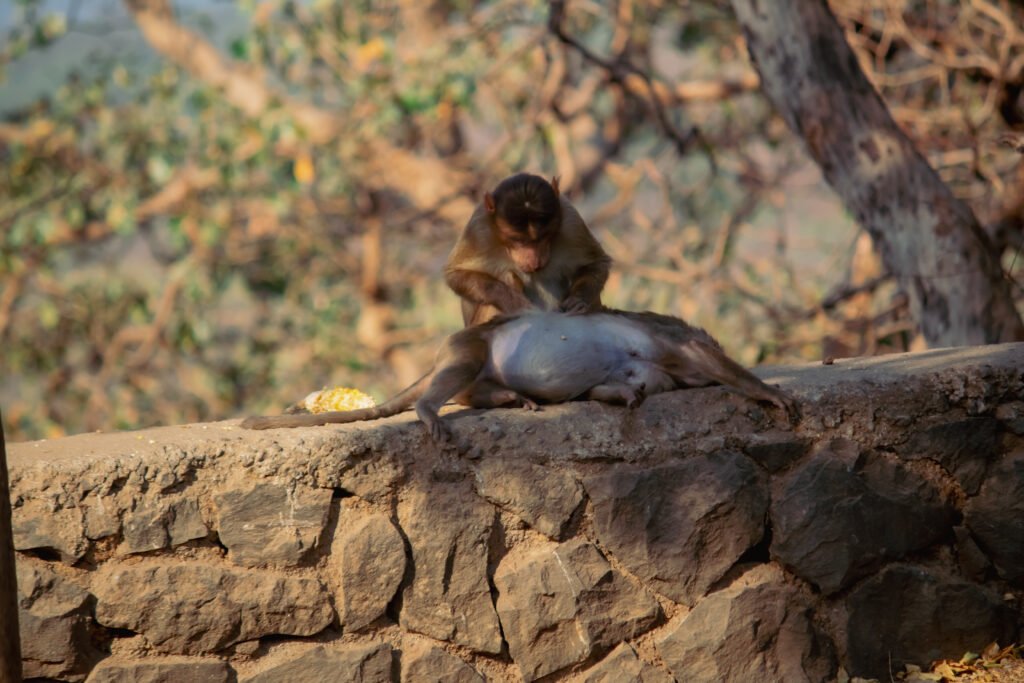
I spent hours watching a group of macaques near stone walls. Nothing special—no mountains, no coast. Just broken stone, dirt and trees.
At one point a mother macaque walked down a dirt path with her baby resting on her belly. The late afternoon sun was low. Cut through the branches. The light made their fur bright. The background turned into shadows.
Because I sat on the dirt the image felt close and quiet like I was looking down from above like a tourist.
Ten minutes later two younger monkeys sat on the wall grooming each other. I moved closer framed them tightly and let the rough stone fill the edges while soft backlight outlined their shoulders.
I could not tell them where to sit. You cannot direct wildlife. All you can do is find a spot where the light works sit down stay quiet and wait for the world to show itself.
Landscape work follows a plan.
Do You Need Equipment?
Short answer: None of these landscape photography tips need an expensive camera.
Current mirrorless cameras have lenses that give sharp edges even when you crop by 200 percent. A sturdy tripod helps if you want to take thirty‑second water blur shots at dusk.
I have found that none of that equipment knows where to point itself. It will not tell you when the light looks washed out or when to crouch behind a fallen log to capture a foreground.
I suggest using whatever you have in your pocket. Set your phone to a mode where you can control focus and walk around your block. Watch how shadows move from noon, to five o’clock. Learn why some angles make a plain fence look interesting while others look like a backyard chore.
When your camera starts to limit your ideas consider an upgrade. Until then I train my eye.
Quick Answers to Common Questions
What’s the best time of day to shoot?
Early mornings after sunrise and late afternoons before dark are times for shooting. The sun is low shadows are long and light is soft. Overcast, foggy and rainy days are just as good for nature shots.
How do I make my nature shots look less boring?
I lower my camera. I get within six inches of the dirt, water or grass. Eye‑level angles are boring because everyone sees the world that way all day.
How long should I observe a location before shooting?
There’s no fixed time, and I wouldn’t trust anyone who gives you an exact number. The right amount depends on the place and the light.
Here is how I’d approach it, based on your own process:
- Start with a few unhurried minutes. Walk around and look before you take the camera out. Watch where the light falls and how the shadows change.
- Stay longer if the light is changing. Sometimes a small shift in sunlight turns an ordinary scene into something special, so waiting is part of the shoot.
- Stop observing once you know your subject. If you can say what caught your attention and what you want the viewer to notice, you’re ready to compose.
- Don’t let it become an excuse to never shoot. Take your five or six deliberate frames, check them, and move on.
What camera settings should I use for landscape photography?
There’s no single correct setting. It depends on your light, your subject and the effect you want, which is also how the article answers it. These are common starting points, not rules, and they are general photography knowledge rather than something from your interview.
- Aperture: Many photographers start around f/8 to f/11 to keep both foreground and background reasonably sharp. Open wider for a softer background, as in your monkey shots.
- ISO: Use the lowest your camera allows, usually 100 or the base ISO, to keep the image clean. Raise it only when light drops and you can’t slow the shutter.
- Shutter speed: This follows from the other two. In low light it gets slow, so use a tripod or brace the camera. For moving subjects like wildlife, you need it fast enough to freeze the motion.
- Focus: Focus on your main subject, or slightly into the scene if you want depth.
- File format: Shooting RAW, if your camera allows it, gives you more room to adjust light and colour when editing.
- Check the screen: Review the image and adjust, which matches your habit of looking at your screen between shots.
What is the most common mistake beginners make?
Based on your own experience, the most common mistake is focusing on the camera more than on what you’re actually seeing. Knowing how to operate a camera is only part of making a good photograph.
That one habit shows up in several ways:
- Shooting on arrival. Beginners reach a beautiful place, take a few pictures and move on without understanding the light or what makes the scene interesting.
- Ignoring the light. The same landscape can look completely different depending on the direction, quality and strength of the sun.
- Fitting too much into one frame. When we see a beautiful view, we want to capture everything, so the viewer doesn’t know where to look.
- Leaving distractions in the background. Clutter pulls attention away from the subject.
The underlying point is that a beautiful place doesn’t automatically produce a beautiful photograph. The angle, framing and timing you choose decide the result.
The fix is the one habit you gave me: slow down and observe before pressing the shutter. Then ask yourself what exactly you want to show in the frame.
Do I have to carry a tripod?
I do not need a tripod unless I am shooting in woods after sunset or trying to turn running stream water into silk. For daytime walking around handheld shooting is sharp enough.
How shots should I take at one spot?
Here is the one landscape photography tip that has saved me the most editing time: don’t hold down the shutter. I used to fire off a hundred frames in a burst, then hate myself at the computer while sorting through them.
Now I take five or six deliberate shots. Between each one, I change my height or step two paces to the side, check my screen and try again.
Before I press the button, I pause for three seconds and ask myself what made me stop and look. Once I have my answer, I frame the shot so the viewer can’t ignore that thing, and I remove everything else. It is the most practical of all my landscape photography tips.
If you want to see field shots or check out my work head over, to [andhruv.com].